Posted on 1 Comment

6 Steps to Making Your Food Blog Stand Out from the Crowd

Blogging is considered a must-do activity by many. With so many food blogs out there, it’s not always easy to gain loyal readers and blog traffic. The key making your food blog stand out from the crowd and giving your readers a reason to keep coming back for more.


Here are 6 ideas to get you started…

#1: Blog for the Right Reasons

If you blog just because it sounds like fun, it will probably be difficult to gain a large audience. When you blog because you have a unique message and an urge to help your readers, you will help to ensure that your blog stands out. If you discover that you are not blogging for long-term success, you may need to change your focus, mindset, goals, and expectations to incorporate the right reasons to blog.


To help you come up with your story or message, check out our Telling Stories through Food Blogging study guide. You’ll learn how to take that story and turn it into something meaningful for your audience.


For example, Colleen blogs with the purpose of sharing her health and food information, related to her Gluten-Free and Dairy-Free diet at her website MyDairyFreeGlutenFreeLife.com.

#2: Craft a Catchy Blog Name

There’s a lot to be said about a blog name. It’s not what will make or break your success, but a great name sure can go a long way to making readers want to click through and see what you’re all about that.


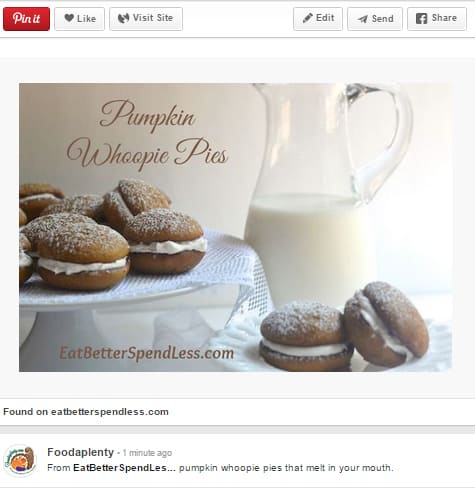
For example, KetchupWithThat.com is a fun name that is memorable and provides the casual atmosphere Mary wants to convey. EatBetterSpendLess.com is a domain that promises a specific benefit that will appeal to Beth’s readers.

Eat Better Spend Less

#3: Build Relationships with Your Readers

Some bloggers ignore their comment section completely. Other bloggers reply to every comment. While you may not have to go that far, these bloggers develop a community of loyal fans. When readers feel as if they have something in common with you, they matter to you, and that you really care, the readers are more apt to become loyal fans.


Geneviève, AKA “Gigi” has a very popular website at GigiEatsCelebrities.com, and she actively engages her followers. Her blog has a unique voice and energy that really captures her visitor’s attention.


#4: Customize Your Theme

If you want your food blog to stand out from the crowd, it’s easy to customize it to match your branding. Make your blog or website unique and visually appealing. Take advantage of your catchy name, unique selling points, and anything that will help your readers remember you. Keep your customizations relevant to your brand.


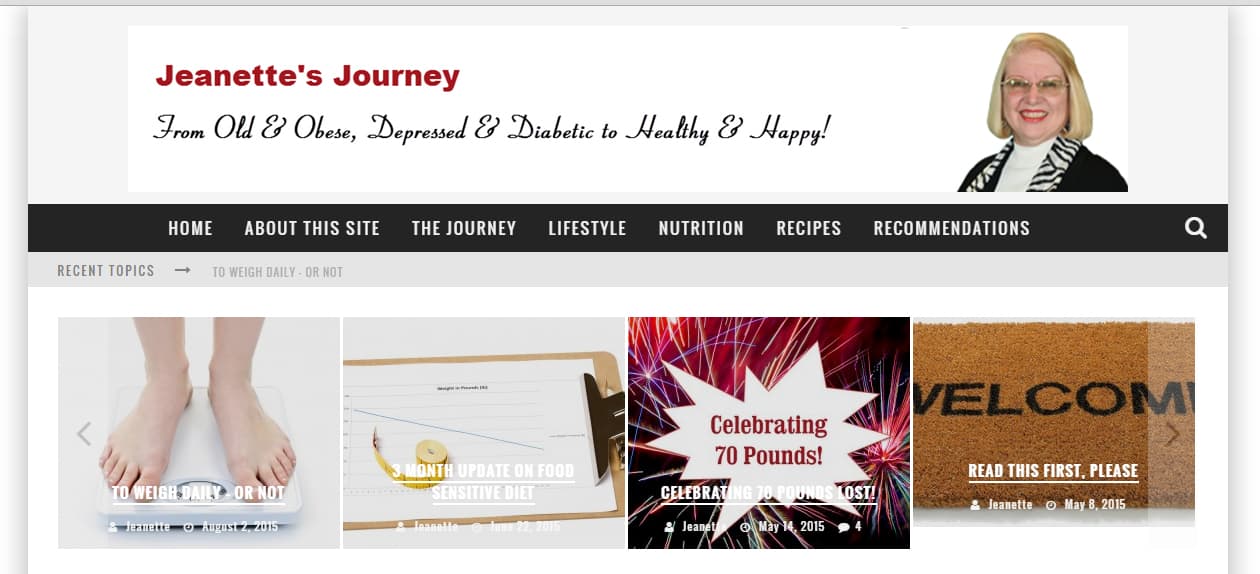
Take a look at JeanettesJourney.com. She has a fairly simple design, all focused on sharing information about her journey to a healthy lifestyle. Her story is inspirational and her posts helpful to others on the exact same journey.


Jeanette's Journey


Or if you’re interested in something more feminine, Jennifer’s HomeInTheFingerLakes.com has a homey feel throughout and is a perfect match with her desire to create a feeling of community with her website.


Home in the Finger Lakes

#5: Develop Your Own Style

It’s tempting to imitate the blogging style of popular blogs, but don’t. You have your own style and your own story to tell. You don’t have to be a “safe” blogger either. You can be quirky, or controversial, or as funny and bold as you want. Find a new way to approach your topic and run with it. Sometimes it takes time to develop this, but keep working at it. See what feels right for you and what resonates with your audience.

#6: Make Quality a Top Priority

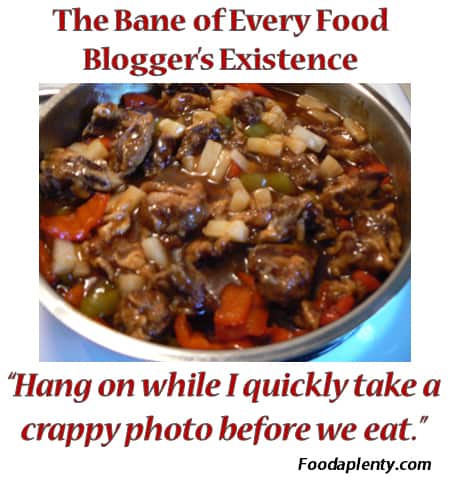
Write the highest-quality posts that you can. It’s better to publish two quality posts that will be read and shared by lots of people than to publish twenty-two poorly written posts that are off-topic or contain fluff and filler. Well-written posts that are packed with details, useful information, and images tend to draw readers like a moth to a flame.


That’s not to say short posts can’t provide impact. Sometimes it’s an amazing photo or a quick update that can also speak volumes to your audience.


A good rule of thumb is to blog consistently and with purpose. If you find yourself running short on ideas, check out our monthly Content Planning & Monetization Ideas guides to help you develop a consistent publishing schedule packed with timely and useful information for your audience.


How can you use these suggestions to give your food blog an edge over the competition? Incorporating them will help you stand out from the crowd and help you build a solid foundation that will help you enjoy long-term success.

Posted on

Chinese New Year Book with Photos

Chinese New Year is a very symbolic holiday with traditions to bring luck, health and prosperity in the coming year. It also means a lot of delicious and symbolic foods. This recipe includes 10 great recipes that your readers can easily prepare at home to participate in the holiday.


This is a content and photo package that you can publish on your website, sell, share on social media and more. You can edit, brandand monetize this content as much as you’d like. It’s all up to you when you purchase your private label rights below.


Here is what’s included in this ready-made content pack…

Delicious Chinese New Year Recipes to Bring Your Good Luck, Health and Prosperity

This “Delicious Chinese New Year Recipes to Bring Your Good Luck, Health and Prosperity” book has 10 delicious recipes and their symbolic meanings. It includes 3843 words and 12 images (one for each completed recipe, plus a couple more) to help your readers get in the delicious spirit of the holiday. The recipes included are:


  • Longevity Noodles with Chicken Meatballs
  • Pineapple Tarts
  • Clay Pot or Rice Cooker Chicken with Garlic Rice
  • Egg Tarts
  • Chicken or Pork Stuffed Fried Won Ton
  • Chinese Pork Dumplings
  • Chinese New Year Cake (Niangao)
  • Cantonese Pork and Shrimp Spring Rolls
  • Buddha’s Delight (Jai)
  • Sweet and Sour White Whole Fish

Here are a couple of sneak peeks inside…

Chinese New Year Cookbook with PLR


Chinese New Year Cookbook with PLR


Recipe Book Ecover Set with Editable File


Ecovers Included


12 Photos Included


Each recipes comes with a photo of the completed dish, plus there are 2 extra images.  In addition to using the photos in your cookbook, you can use the photos on your blog, on social media or wherever you post images. Be sure to add your URL or logo before posting.


Here’s a sneak peek at the photos:


Images Included

Images Included


The 10 Recipes in Txt Format

If you’d like to publish the recipes on your blog or Facebook feed instead, we’ve also provided them in individual text files to make it simple.


Recipes in Text Format


To Recap, Your Package Includes:

  • Delicious Chinese New Year Recipes to Bring Your Good Luck, Health and Prosperity” (10 Recipes, 3843 words and 12 images)
  • Complete recipe book ecover set with editable PSD file
  • .JPG version of the 12 photos
  • Each recipe in text format, so you can publish on your blog and more

You can get it all this content for just $19, saving you a ton of time researching, creating content, making the projects, taking photos and editing graphics.


Add To Cart


Posted on 5 Comments

An Important Secret to Earning from Your Food Blog

earning secrets for food blog

Many of our members have told us that they love food blogging, but they aren’t quite earning what they’d like from it.


If that’s you, don’t worry because you’re definitely not alone.

In fact, most people who blog earn little to no money with their blogs. That shouldn’t discourage you though because it’s the same with all small business owners. Sadly, MOST are not successful.


The good news is, you can to be successful and do what you need to get where you want to be. Over the past 12 years or so, we have helped a lot of people grow their online businesses. And, of course, we’ve been growing our own all along as well. In that time, we’ve discovered a number of key things that make bloggers successful and we wanted to encourage you with one right now.  Here it is. It’s so simple…

You HAVE to get Help

Food blogging is certainly a labor of love. There is absolutely no doubt about that.  But there’s a problem. If you’re spending all your time making food, taking photos and painstakingly writing our recipes, there isn’t a lot of time left over for business building activities. Add to that, if you’ve got a job outside the home or another business, it’s like you can barely find the time to get the blogging done at all. We can completely understand that. But there’s one thing we learned over the years and that’s to. When you’ve got people taking care of various details, you can focus on developing products and figuring out what your business needs to grow. That means hiring people to help you with various tasks, partnering with other blogger to share workload or even using ready-made content like we have at Foodaplenty.


Of course, when we tell people that, there first objection is “I can’t afford that. Well, you can’t really afford to stay stagnant where you are either. Getting more help for your business is part of a growth process. You do just a little bit at at time. Each time you pay someone to help you, you can focus on money-making activities and when you see that money come in, you can invest in more help.


Think about businesses in the “real world”. There are employees and there are managers and in very successful companies, there are CEOs. You might work your way up the ladder, but your goal is to be the CEO of your business. You need to be the person who has the vision for your business and makes sure you get there. You might be a hands-on CEO that might still create a lot of content, but you need to start removing yourself from the daily grind.


This is such a labor of love, but what happens to it when you can no longer keep up with it? What if life gets in the way or you want to retire? You want something in place that allows the business to continue to grow while you’re not there. Now, that may or may not be a long time from now, but it’s something to prepare for.


If you need some starting steps to get to being CEO, here are a few ideas. Take one, start small and grow from there.


  • Hire a Virtual Assistant. A virtual assistant can help answer emails, schedule interviews, update your web pages and do all kinds of things that take up your day.
  • Hire a Ghostwriter. There is no reason you have to write all your content yourself. Plus, a well-trained ghostwriter can take on your voice and put your ideas into print.
  • Get Help with Graphics. Even if you take all your photos, you can have someone else edit them or create shareable graphics for you. Shannon Smith at Appetite for Design does a great job of this.
  • Get Some Ready-Made Content. Our Bite-Sized Bundles white label recipe packages feature original recipes with photos, social media graphics, product reviews and much more. Or try one of our recipe book or other ready-to-publish content packages.
  • Be a Part of our Facebook Group. You can connect with others to start new projects, find guest writers for your site and more. Click here to join us.

As you can see, there are even ways to get help for free. Take advantage of what’s available to you and build on it.


Now before you head off and start getting help, we just wanted to encourage you further because…

Here’s Something Successful Bloggers Don’t Always Tell You

This one is really important because this is where a lot of people get stuck. You don’t have to have a HUGE following to make plenty of moolah. If anyone has led you to believe that, they are just plain old flat-out wrong.


The secret is to be smart and approach your blog as part of your business. Many people just keep blogging and blogging, hoping that once their RSS subscribers reach a magical number, they’ll be rolling in the dough (figuratively speaking, of course). It rarely happens that way.


So for now, abandon the idea that you have to be the next Simply Recipes or some other huge food blog. Just start working smarter and get help to grow your business. It will get you far.

Posted on 2 Comments

Tips for Using Food Photos on Social Media

food graphics

Food Photos on Social Media


There’s no doubt that food content online is a very visual subject. You can’t smell or taste the food on the Internet (yet?!), so it’s important to stimulate your readers senses through what your audience can see. And when it comes to social media, capturing the eye and attention of your distracted follower is even more important because there is so much competition for attention. With that in mind, here are some tips to help you create and select the best images for your social media.

Getting the Right Photos

The first step in using graphics to promote your food blog on social media is by creating or even purchasing a great image. You want an image that reflects your message. The message is the easy part. It’s what you want to say. Choosing the image shouldn’t be difficult either.

  • Choose images that are in focus. How many times have you seen an out-of-focus image that distracted you? In this age of mobile responsive web design, this is trickier than you might think. Responsive websites resize your images to fit the screen size of the device used to access them, and this can create fuzzy images. This article by ManageWp explains the issue in more detail, along with some recommendations on how to fix it. (Link opens in new tab)
  • Pay attention to the background. What’s behind your image? That image of your delectable cake won’t be so appetizing with a pile of dirty dishes stacked behind it. For example, in the image below, pinned from PinchofYum.com, the background is kept to a minimum and blurred. The focus is on the Fettuccine dish.

Background is Important


  • Choose images that reflect one word of your marketing message. Do you want your viewers to think about yummy, delicious, sweet, sour, hilarious, lifesaving, or simple?
  • Opt for images that have a higher resolution. An image with 96 to 150 dpi is a good size and it loads faster than a higher resolution.
  • Always, choose an image that is the right size for the social media platform. Begin with a slightly larger image. It’s easier to make the image smaller without making it pixelated.
  • Go through lots of images and angles of the same food before choosing one. Choose something that describes your content. Remember your images should tell a story as much as your written content does.
  • Use good lighting so your finished product is shown to its best advantage. If possible, take your product outside to photograph. This close up image, also pinned from Pinch of Yum, is lit from above so the shadows appear low on the image.

Creamy Baked Corn

  • Pay attention to the composition as well as how your food and other items are laid out in the image. Keep the center of interest or main subject slightly away from the middle of the photograph. Doing so makes your image more interesting.
  • Use negative space to create a sense of intrigue. It’s fine to have very little in your image. Just a bowl of strawberries can be more intriguing than a bowl of strawberries in front of a plant set on top of a large platter covered in linens. The image here is set off-center and shows only the chocolate chip bars and the plate.
  • Know your audience. Your intended audience will determine the props you use to surround your food. Raw ingredients included in the finished product image will appeal to cooks. Antique kitchen utensils or a favorite tablecloth will appeal to friends and family. If your market is restaurant owners or diners, use props like recipe cards.
  • Have a clear call to action. This can be as simple as adding your website address to the image, but can often be a stronger call to claim a free offer, such a a recipe book.

By the way, we’ve done a lot of this work for you with our ready-to-publish Bite-Sized Bundles Recipe Packages. Each month, we develop new recipes, set the scenes and take tons of photo before making the final cut. Check it out – we’d love to have you join us. Each of the social sites will have specific rules for using images. Pay attention to recommended sizes and resolutions for each site. Here are specific tips for popular sites like Facebook, Twitter, and Pinterest.

Using Images on Pinterest

  • Put good descriptions and captions on the photos you upload to your website first. That way when someone pins your picture, it will pull the description you’ve already included. Most people don’t bother to change the description on images they pin.
  • When pinning your own pictures to Pinterest, use good descriptions and a link to your website. For an image of your favorite whoopie pie recipe, instead of using a description like “Pumpkin Whoopie Pies”, use something more appealing to searchers like “From EatBetterSpendLess.com, pumpkin whoopie pies that melt in your mouth” (pinned from EatBetterSpendLess.com).

Pumpking Whoopie Pie


  • Pin your food images to specific categories. For example, if people go to your Food board you don’t want your viewers seeing endless videos of your dog (unless he’s enjoying your food, of course). They probably won’t be following you very long.
  • Get creative with your categories but keep them simple enough that others know what the board is about. For example, these categories from the Comfort Food Mama uses clever descriptive words like Dream Desserts for each board.

Pinterest Categories


  • Each board should be for a specific topic. This allows people to follow only those that interest them. This is especially helpful for pinning pictures of other people’s recipes. Chobani’s Pinterest account, does this by having boards with recipes that contain one of their products.

Chobani on Pinterest


Pinterest-Like Sites for Foodies

Several social media sites are specifically geared toward foodies and are quite similar to Pinterest. Here are a few to check out:


  • FoodGawker.com — This site is a curated photo gallery that allows food bloggers to submit photography and recipes.
  • Taste Spotting — Users submit images/links from around the web and their editorial team reviews the submissions for high quality.
  • Food52 — This is a social site for recipe input and commenting.
  • Food Buzz — This site allows independent food blogs around the net to join and contribute.

Using Images on Facebook

On Facebook, your images should be clear and easy to view. If it’s blurry, has poor contrast, is dark, cropped funny, or has low resolution it can be hard to tell what the image is. People will move on quickly. You only have a few seconds to make a good impression. Your image needs to be simple and straight to the point. Use the correct size images. On Facebook the uploaded cover photo size is 2048 px X 2048 px while the Timeline photo thumbnail is 504 px X 504 px.


Create a text overlay with your website’s link using online editing tools for a specific call to action.

Use descriptive information in the post so viewers know what you are sharing and can easily share it with others, like this post from Foodbeast.


Description


When you upload images to Facebook, make sure you preview them before posting. You may need to adjust how they are cropped so you are seeing the best part of your image.

Specific Tips for Using Images on Twitter

Twitter is fairly new to showing images and not all apps who them, but  gere are tips on getting the most out of Twitter for your food blog graphics.


  • Horizontal images work best on Twitter. Long vertical images can get cut off when they appear in a user’s Twitter stream.

Here’s an example where the image gets cut off when the image is taller than it is wide. The image looks good on the actual Twitter account page, but in your follower’s stream, it gets cut off like this.


Twitter Image Mistake


Here’s an example from Food Network with a photo with good dimensions:


Food Network Example


  • Tag people or companies in your images, particularly if you share product images. Include the company’s Twitter handle.
  • Overlay words on your images before you share them. Use your blog URL, the title of a post the image relates to or a simple caption.
  • Use bright colors in your images to get attention. They’ll stand out amongst all the other content.

Using graphics on social media is the optimal way to promote your food blog. As any foodie knows, we eat with our eyes first. Seeing images of your creations helps viewers relate to your food blog posts. And remember, if we can help you save a lot of time and work creating your own photos, consider joining our Bite-Sized Bundles monthly recipes with original food photos membership and we’ll take care of the photography for you.

Posted on 3 Comments

Balancing Feeding Your Family and Food Blogging

No doubt about it, the life of a food blogger is kind of cool. You get to combine a few important things into one:

  • Your passion for food…oh, glorious food.
  • Making sure you and your family eats. You know, because they have to.
  • Earning an income from home and from your computer.

It’s pretty awesome to be able to turn what you love into a living and serve your family at the same time, right? But that doesn’t mean it doesn’t get kind of hectic. Sometimes it is tough to balance.

How many times has this happened? You planned to feature a recipe on your site, so you made it, but then you forget to take a picture. Or you’re in such a hurry, you don’t have time to set up a nice shot and it comes out blurry, too dark and just a mess. You know, it goes a little something like this…

The Ban of Every Food Blogger's Existence

Or when you’re so busy and creating meals on the fly, you just never quite get around to making that blogging plan. After you take the last bite of that amazing lasagna you think…dang…that would have made an awesome blog post.  The good news is, it’s not too difficult to balance everything, so your family eats AND you get great blog content. Here are a few ideas for you.


  • Plan your meals in advance. We know, we know…who has time to get organized? But funny enough, when you’re organized in one area of your life, everything else starts to fall in place. If you do a monthly or weekly menu plan, you can ensure you have plenty of great ideas for your family to eat and for you to add to your blog. It’ll also save you plenty of time at the grocery store, save you money and even afford you more time for blogging.

Planning doesn’t have to be detailed or fancy. Lynette uses Google Calendar. She has a family calendar for events but daily meals are also added to the family calendar. That way, everyone knows what’s for dinner without asking.

In addition, because Google Calendar is hooked up to her phone, that gives her the flexibility of adding a meal when she thinks of it, while at the store, waiting in line or anywhere. Although her preferred method is to set aside a few minutes every Saturday, the freedom to add and edit on demand is much appreciated.

  • Plan the scene in advance. If you’re cooking a meal for your family and know you need to take a photo before you eat, set the scene before you start cooking. Whether it’s a place mat, cutler or garnishes, have it ready to go, so you can swoop in with your camera quickly.

Research styling of your particular dish on Pinterest (we have plenty of ideas for you on our boards) or through Google. The more prepared you are in advance, the more likely you can avoid the disaster photo like shown above.

  • Set aside a plate for later photos. The problem with taking photos just before you eat, especially at dinner time in the winter months, is that the lighting is rarely ideal. Yes, you can use a lightbox or other artificial lighting set up, but realize that natural light usually produces better results, unless you have a very professional set up.

Add to that, food that is cooled often results in a better photo. Food that is steaming isn’t particularly photogenic. To combat this, set aside a portion for a photo for the next day. Then you can have time to set up the scene properly and get the best light.

Just be sure to tell your hungry teen boy that if he touches that food before you take a photo, he’ll lose his wifi privileges.

  • Schedule a photo shoot day. At Alice’s house, there are often “Photo Shoot Days” that the whole family loves. It’s a day where Alice just makes food to photograph, one dish after another. There are no scheduled meals that days, but the family knows there is some yummy stuff coming and it will trickle out of the kitchen throughout the entire day. Alice generally prepares the food in smaller batches, so she can get through a lot. Plus, there are plenty of leftovers, so the household cooking is much easier for many days after.
  • If the photo is bad, all is not lost. Just because you didn’t get a photo, doesn’t mean all is lost. Sure, food content always goes better with photos, but you can always take a photo of some of the ingredients or even just the right stock photo can work in a pinch. Or if you want to make sure you have a photo, write the content now, put it in draft and add the dish your meal plan again for next week.
  • Hire a writer. If you’re so busy with all the little details of your site, it’s easy to get overwhelmed and frazzled. A good ghostwriter can help you create articles about food, rework recipes, schedule posts for you, and more. Then you can focus on testing and photographing the recipes or creating other content for your audience.
  • Use our ready-made content and photos. Of course, you can also lighten your load by using and adapting the ready-to-publish food and garden content we have for you. We have photos, recipes, reports, articles and more. You can edit them, add to them, brand them, monetize them and use them how you’d like in your content plan.

It’s not always easy getting it all done, but give yourself a break. We’re our toughest critics and harshest bosses, but with a little planning we can get to where we want to and have a fresh supply of great food content on our sites.

Posted on

What to Send In Your Food-Themed Newsletter

food newsletter

While you are busy creating great blog content, don’t forget about growing your all-important email list. It’s not enough to have a “Blog Notification” list (a list where your subscribers are simply notified about your new posts), you really need to grow a mailing list that you can contact directly. Otherwise, you’re leaving a lot of money on the table.


Benefits of Having Your Own Mailing Lists:

  • High Conversion Rates: According to the Direct Marketing Association, email has a return on investment (ROI) of $40.56 for each dollar spent. And as solo business publisher, your ROI can be even higher. Quite simply, people buy through email offers.
    .
  • It’s Inexpensive: It costs very little to email your list. Many autoresponder services, like Aweber cost very little if you have a small list, so there is no excuse not to get started. (affiliate link)
    .
  • It’s a Direct Way to Reach Your Followers: Loyal fans of your blog are awesome, but they have to remember to come back and visit. When you email them directly into their email inbox, you can reach them more directly and in a more personal way. When you send an email to one person’s inbox, it is perceived as more personal than if you’re speaking to a group on a blog or in a Facebook group.
    .
  • It’s Commercial by Nature: As a blogger, you probably know that most people don’t expect a sales pitch on a blog, but email doesn’t have this barrier. People expect to get product offers and from the Direct Marketing Association numbers above, we can see they also take action on these offers.
    .
  • Social Media is Not Enough: Social media is great and it’s definitely a way to build rapport with your audience, but it lacks the commercial nature of email and user’s attention spans are generally more fleeting in that environment.

A lot of people tell themselves they’ll start their mailing list later, but when you wait, you waste all that traffic that comes to your site and never returns. When you have their email address, you can remind them to come back over and over again. So, no more excuses, okay? With that in mind, let’s talk about…

What Should You Send Your Food-Themed Mailing List

Never run out of ideas by keeping this list handy. It’s been adapted (with permission) from Annette Elton and Alice’s original list… here we’ve added some more food-themed ideas.

Now, let’s get to those ideas…

1. Weekly Roundups: Let your email list know what’s happening on your blog and in your business. You can even share content from other sites as well. Mention recipes you’ve posted, books you’ve read, cooking classes you’re taking or running, ebooks you’ve released, and more.


2. “How to” Content: Share instructional content with your subscribers to add value. Show them how to do something that easily lends to promoting another product, whether it’s through an affiliate link or one of your own products. For example, if you teach a certain cooking technique, send them to a recipe book or cooking course. Or if they need certain tools or devices – review and recommend those.


3. Educational Content: Consider sending an educational series that connects weekly messages and tackles a topic more in-depth. Keep the momentum going over a period of time to fully educate your subscribers. For example, you could start a series on Cajun Cooking or avoiding GMOs.


4. Checklists: Help guide people through tasks with checklists they can print and re-use. This is high-value brandable content they’ll refer to over and over again. Think shopping lists, pantry essentials, and more.


5. Worksheets and Quizzes: Allow subscribers to work through problems and challenges by asking tough questions and providing potential solutions. Whenever you can help your subscribers accomplish something, you boost your reputation with them. If you help people switch to a clean eating diet, help them evaluate their diet now and figure out what they need to do to transform their lifestyle.


6. Product Reviews and Comparisons: Help consumers make the best product choice for their needs. Your subscribers will thank you when you help them make the best buying decision possible. And of course, don’t forget to include your affiliate link. Whether it’s books, recipe books, menu planning services, gadgets or devices – there are plenty of things to review in the food niche.


7. Share Relevant Facts and Statistics: Compelling statistics can be used to motivate action and conversions. They’re great for sales page, but emails and other content as well. If you’re boasting the benefits of eating raw greens, do your research and share the scientific data. If some data is a bit more complex, refer your readers to a handy resource. They’ll thank you for the knowledge.


8. Frequently Asked Questions: Share answers to the questions you receive most often. Ask your subscribers to submit questions, so they feel a deeper connection and you can help them with what they really need. If you teach the basics of cooking, you can share things like how to cook an egg, how to measure dry ingredients, and other tips that would come in handy to your readers.


9. Industry News Commentary: Discuss your thoughts and feelings about industry news, changes, events, and controversies. Use your email messages as a tool to spark conversations. Staying educated about what’s happening your industry is a good thing all around. For example, if you’re blog focuses on eliminating GMOs in your diet, you’d want to stay on top of what the scientific community is sharing on that topic.


10. Coupons and Special Promotions: Deliver coupons to your audience or share exclusive or limited-time promotions. Share them for your own products or ask a vendor to extend a special offer to your list. You’d be surprised at how many sellers are willing to offer your subscribers a special deal.


11. Make Announcements: Are you launching a product, hosting or attending an event, or making changes to your business? Use email to keep your prospects and customers aware and engaged. It’s the best way to reach them directly.


12. Contests and Sweepstakes: Launch contests and sweepstakes through your email list and get more people involved and excited about your business. People love free stuff and they even love to spread the word about free stuff, so you can grow your traffic.


13. Share Useful Tips on Relevant Topics: Tips are amongst the most popular types of online content. When you keep your emails simple and to the point, your readers are more likely to take action.


14. Videos: If you have a video channel, share links to your video or embed the video in the body of your email message. If you don’t have any video to share, find some great ones your subscribers would be interested in. There is no shortage of great food videos on YouTube.


15. Online Live Events: Invite your readers to join you for a Google+ Hangout. Whether you talk about food issue or run a cooking demonstration, it’s a great opportunity to connect with your subscribers. You can also share snippets or quotes from the event to provide value and market the event. And don’t forget to email your subscribers, so they can find the recording of your event too.


16. Interviews: Interview industry experts and share all or a portion of the interview in your email message. (Sharing a few great tips with a link back to the full interview on your website is a great way to get your readers to return to your site). Either way, this s a great way to deliver useful content and to build relationships with players in your niche.


17. Challenges: Challenge your subscribers to achieve something within your niche and to share their results. For example, you could host a 30 Day Slow Cooker Challenge — or a 2 Week Don’t Eat Out Challenge… you get the idea! The possibilities are endless.


18. Images: There are a number of different ways to approach sharing images in your email marketing. You can share:


• Photos
• Cartoons
• Memes
• Pins from your Pinterest account.
• Infographics


Get your subscribers involved in the image sharing too. Ask them for photos using your product or other images they want to share. Food is a very sensual experience, but you can’t send taste over the Internet just yet, so fulfill that visual experience with photos.


By providing your subscribers with fresh and useful content on a regular basis, you form a stronger relationship where they trust you as a reliable source. And when they trust you, they’re more likely to buy your products or the products you recommend through affiliate links.


It’s a win-win for all!

For more on what to send in your food-themed newsletter, check out these 20 “Can’t Miss” Email Marketing Cheatsheets!  


Posted on

The Great Big List of 99 Food Blogging Tips

The Great Big List of 99 Food Blogging Tips

If you’ve ever wanted a list of 99 random, but very useful, food blogging tips, here ya go!

The Great Big List of 99 Food Blogging Tips

  1. Use your ingredients to tell the story: Succulent peppers for hot summers, cucumber slices on crushed ice to refresh, etc…
  2. When photographing food, ask yourself: “What story do I want this to tell?” Make sure every prop supports the story.
  3. Be sure to use warm light when photographing food. Cold light will make your dish look lifeless and unappealing.
  4. Use close ups to make food feel actual size, emphasizing mouthwatering details such as the sparkle of sugar or a buttery flake.
  5. Combine details of your life with your dish or ingredients, when photographing food to go with a personal story.
  6. Adjectives should be used sparingly or they’ll seem overused. Limit the use of delicious, amazing, etc.
  7. Tell stories with the cooking process. A floury rolling pin on a dark counter with floury child fingerprints can say everything.
  8. Remember that ingredient lists are not under copyright: Processes containing personal details are, so you still can’t copy recipes.
  9. Use vintage props or old family photographs to help create a nostalgic mood and share a great food story.
  10. Reminder! If you provide links or blogrolls to outside sites on your food blog, do check occasionally to make sure these links are still valid.
  11. Use hashtags to encourage people to spread your story. For example: #WildBerryPicking; #ChristmasTreats.
  12. What will better help your story along? Photographs of the ingredients, the finished dish or the process?
  13. Decide your focus: The food, the plate or the props. Which one best tells your food story?
  14. Give your recipes descriptive, tempting names that add to the story. Then use them as a hashtag. (#BourbonBBQSauce, anyone?)
  15. To improve Google SEO in your food blog, so don’t forget to use relevant keywords
  16. Use local flowers or herbs in vases to add ambience to dishes containing those ingredients or representing an area.
  17. You don’t always have to put a flower in a vase or a cold drink in a glass. Just saying’…
  18. For whimsy, add garnishes such as lemon slices, dill sprigs or rock salt to fresh, uncooked ingredients such as just-caught fish.
  19. Create ambience with light, texture and props, when it comes to photographing foods. But always make sure these support your story.
  20. Check your assumptions, once in a while. Show your food photo to ten different people and ask: “What does that say to you?”
  21. If you want to photograph other people in photos, ask permission—and have them sign a model release.
  22. You can discreetly photograph other diners in a restaurant—if no part of them is personally identifiable e.g. you blur them or use a back view.
  23. Don’t stage. Present the people as well as the food. Let them be themselves – they’ll add authenticity to your food story.
  24. Always give credit generously. Showcase your food blog guests. Help them drive traffic to their site. They’ll return the favor.
  25. Food is about community: Never forget that, whether you’re taking about family food adventures or making blog marketing decisions.
  26. Tell food stories with texture: Rough grains and unpeeled veggies for rustic, farmhouse-kitchen recipes, delicate china for English teas, etc.
  27. If you are running an ethnic food blog, use location photos from that culture to add to the ambience.
  28. No matter how personal your food reminiscence, remember that readers should be able to instantly identify with it.
  29. Never give a slanted review to please a sponsor or someone who has given you a free sample or item.
  30. If you’re presenting snacks in photos, show them “on location”—i.e. with people actually eating them in situ.
  31. Try giving your blog a title and domain name that makes your blog’s focus crystal clear (e.g.: veggieschoolsnacks.com)
  32. Photograph people eating through a window for added ambience and an original perspective—from outside or in.
  33. Even if your focus is food, pay more than fleeting attention to your lighting. You can totally change the story with a sunbeam.
  34. Pay attention to the color of your food blog theme. Does it support your blog premise and focus—or does it do the opposite?
  35. For the most impact, make sure your blog tells a story. Who are you and what drives you to blog?
  36. Sum up your food blog posts in one word. Is there any sentence in the post out of harmony with that summary? If so, kill it!
  37. Steal the interior or graphic designer’s biggest secret: Use repetition of elements to make a food story or photo feel perfect.
  38. In everyday, real life, food gets burnt. Keep it real now and then and don’t sanitize all your food posts or photos!
  39. What’s your signature element in your blogging? A question of the day; a flower by a plate or…?
  40. Use comfort food posts, recipes and photos to make people feel like children again. Stir up those memories, and you’ve got fans.
  41. Show the packaging on foods, if it does a strong job of creating ambience. But ask, if you’re showing a trademark or logo.
  42. Instead of providing lengthy answers to email questions, post more informative content on your site. Everyone wins!
  43. Learn how to professionally answer reader emails. Keep it short and light and don’t ask questions, unless you want a penpal.
  44. Learn to think about overlooked elements: Add to your food photo stories with ice cubes, froth, garnish and so on.
  45. Food—and recipes—are made for sharing. Give common dishes your own signature twist to prompt shares for your blog.
  46. Get out to food events and show your actual community its own members…but ensure you get model releases.
  47. What do you remember about your mother cooking? Her apron? Her fingers or the sparkle of her ring? These are stories.
  48. Foodies are all artists. Never forget that, whether you are telling stories or dishing up practical ingredient lists.
  49. As a chef once famously said: “The single olive made the dish”. What is your “olive” for your food blog post?
  50. Either avoid jargon or use it only to add ambience. Either way, make sure your reader instinctively knows what you mean.
  51. Before photographing, pay attention to what you put your food in. Does it support or add to your story or ambience?
  52. Always make it easy for your food blog reader to find your recipes, use your recipes—and remember where to return.
  53. Use weather as a prop in food blog photos. E.g. storm clouds behind a glass of blood-red Merlot alone on a wet balcony rail.
  54. If you’re photographing a dish in a restaurant, keep it discreet. Don’t use a flash—it will kill both the food colors—and the ambience.
  55. Invest in different cutting boards, plates, cutlery, etc., so you can instantly support any story’s ambience with your food photos.
  56. Ensure your photo tips the scale towards inspiring your reader to actually try or share your recipe. What will it take?


  57. Remember that people share photos more than they share posts. Make sure each post on your food blog has one.
  58. Create and brand a YouTube channel for your food blog. Demonstrate cooking techniques, as well as recipes.
  59. Food blogs naturally lend themselves to blogrolls. Create goodwill to fellow bloggers and a great resource for your readers.
  60. Have a spam filter installed on your food blog (Akismet works). You don’t want your ratings or your readers insulted by spam.
  61. When you take your food photos for your blog, pay attention to the background. Is it contradicting your food statement or story?
  62. Add a “Takeaway Tip” to your blog posts. It’s an easy way to add the branding of repetition and you can be helpful and creative.
  63. What is one unique difference your food blog is known for? If you can’t answer that, no one else will be able to.
  64. Don’t always photograph fruits and veggies whole: Break open for a rustic look. Slice wafer-thin for elegance.
  65. No matter what type of food blog you run, people enjoy a trip down memory lane-particularly if they can relate. (S’mores, anybody?)
  66. Plan your blog posts and recipes in advance. Winging it makes for stressful blogging.
  67. Run fun, informal “contests on your food blog, such as caption contests for quirky photos.
  68. Are your headlines effective? Do they create curiosity or tell readers clearly it’s what they are looking for or evoke memories?
  69. Increase interaction by Tweeting your blog photo and link—and asking readers to describe in one word what it make them think of.
  70. Do you make full use of color in your food photos? Use cool colors when presenting summer dishes and hot colors to “warm up” winter.
  71. Always make sure your food blog stories are actually about your reader—even though the details are about you and your world.
  72. Remember that Instagram is a great place to share your food blog photos—and increase traffic to your stories and recipes
  73. Post a story about the most disastrous meal you ever prepared—and watch your shares go up. People love a good disaster story!
  74. Leave tweets unfinished to make people click to read more. “This collection of vegetables sure made me…”
  75. Answer reader questions in your blog comments section or tweets. This is the best way to turn visitors into subscribers.
  76. A food blog should be like the best sort of party: Introduce your readers to guests (chefs, other bloggers, etc.) they’ll want to meet!
  77. If you always post photos in color, consider switching it up to sepia or B&W, especially for nostalgic or historical posts.
  78. Test your recipes. It only takes one “fail” to lose a reader—and your food blog won’t be recommended or shared.
  79. Attend food events. Food expos, dinner parties, food competitions, local county fairs—get out in the world and liven up your blog.
  80. Don’t just keep an eye on other food blogs—keep up with top photography blogs to see what the pros are doing.
  81. Have a monetization plan for your content if you want to earn from your blog. What’s your plan?
  82. Dish turn out badly, but no time to remake it for a photo? Try photographing your place setting or ingredients instead.
  83. Food storytelling is especially important because food is what has connected people and created communities for thousands of years.
  84. If a reader enjoys your food story, she has shared a meal experience with you. She now feels like she knows you.
  85. Make sure your food photos will also look good on a mobile screen.
  86. What to do with people who email and demand entire cooking lessons: Create a course and invite all your readers to join.
  87. Put a FAQ or Glossary page on your food blog site to help people quickly learn your type of cuisine’s “language”.
  88. Explore WordPress.org to find plugins just for food blogs – there are tons of them there.
  89. Analyze your personal and creative strengths and weaknesses. Create a food blog that utilizes your strengths.
  90. Finding your voice is often easier than you think. Write how you speak and it will come.
  91. Track your results. Which posts do you get the most hits on and on which do readers stay the longest? Figure out why!
  92. Leave helpful, specific comments on other food blogs. Don’t be vague or trite. Give one good reason why you liked a specific post.
  93. Brand and protect your content. “Watermark” the corner of your photos with your URL in light text.
  94. Vary your content delivery. Have a video section as well as photographs, recipes, tip section and posts.
  95. If you have won cooking awards or attend food events, create a Media section on your food blog.
  96. It’s a simple detail, but do make sure your recipes and posts are searchable on your food blog.
  97. Don’t assume everyone knows about cooking processes you take for granted. If you put “make a roux,” provide a link to how to do so.
  98. When creating a food blog, think of all the ways you can make people want to link back to yours. Blogrolls, curated recipes, etc.
  99. Remember to enjoy your food blogging adventure. The moment it becomes a chore or marketing ploy, it will fail.