There’s no doubt that food content online is a very visual subject. You can’t smell or taste the food on the Internet (yet?!), so it’s important to stimulate your readers senses through what your audience can see. And when it comes to social media, capturing the eye and attention of your distracted follower is even more important because there is so much competition for attention. With that in mind, here are some tips to help you create and select the best images for your social media.
Getting the Right Photos
The first step in using graphics to promote your food blog on social media is by creating or even purchasing a great image. You want an image that reflects your message. The message is the easy part. It’s what you want to say. Choosing the image shouldn’t be difficult either.
- Choose images that are in focus. How many times have you seen an out-of-focus image that distracted you? In this age of mobile responsive web design, this is trickier than you might think. Responsive websites resize your images to fit the screen size of the device used to access them, and this can create fuzzy images. This article by ManageWp explains the issue in more detail, along with some recommendations on how to fix it. (Link opens in new tab)
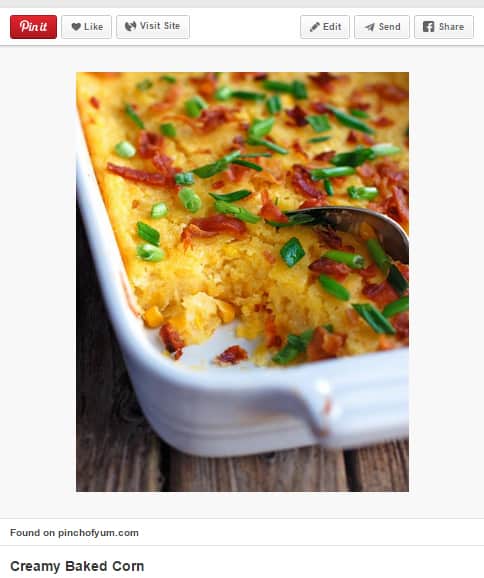
- Pay attention to the background. What’s behind your image? That image of your delectable cake won’t be so appetizing with a pile of dirty dishes stacked behind it. For example, in the image below, pinned from PinchofYum.com, the background is kept to a minimum and blurred. The focus is on the Fettuccine dish.

- Choose images that reflect one word of your marketing message. Do you want your viewers to think about yummy, delicious, sweet, sour, hilarious, lifesaving, or simple?
- Opt for images that have a higher resolution. An image with 96 to 150 dpi is a good size and it loads faster than a higher resolution.
- Always, choose an image that is the right size for the social media platform. Begin with a slightly larger image. It’s easier to make the image smaller without making it pixelated.
- Go through lots of images and angles of the same food before choosing one. Choose something that describes your content. Remember your images should tell a story as much as your written content does.
- Use good lighting so your finished product is shown to its best advantage. If possible, take your product outside to photograph. This close up image, also pinned from Pinch of Yum, is lit from above so the shadows appear low on the image.
- Pay attention to the composition as well as how your food and other items are laid out in the image. Keep the center of interest or main subject slightly away from the middle of the photograph. Doing so makes your image more interesting.
- Use negative space to create a sense of intrigue. It’s fine to have very little in your image. Just a bowl of strawberries can be more intriguing than a bowl of strawberries in front of a plant set on top of a large platter covered in linens. The image here is set off-center and shows only the chocolate chip bars and the plate.
- Know your audience. Your intended audience will determine the props you use to surround your food. Raw ingredients included in the finished product image will appeal to cooks. Antique kitchen utensils or a favorite tablecloth will appeal to friends and family. If your market is restaurant owners or diners, use props like recipe cards.
- Have a clear call to action. This can be as simple as adding your website address to the image, but can often be a stronger call to claim a free offer, such a a recipe book.
By the way, we’ve done a lot of this work for you with our ready-to-publish Bite-Sized Bundles Recipe Packages. Each month, we develop new recipes, set the scenes and take tons of photo before making the final cut. Check it out – we’d love to have you join us. Each of the social sites will have specific rules for using images. Pay attention to recommended sizes and resolutions for each site. Here are specific tips for popular sites like Facebook, Twitter, and Pinterest.
Using Images on Pinterest
- Put good descriptions and captions on the photos you upload to your website first. That way when someone pins your picture, it will pull the description you’ve already included. Most people don’t bother to change the description on images they pin.
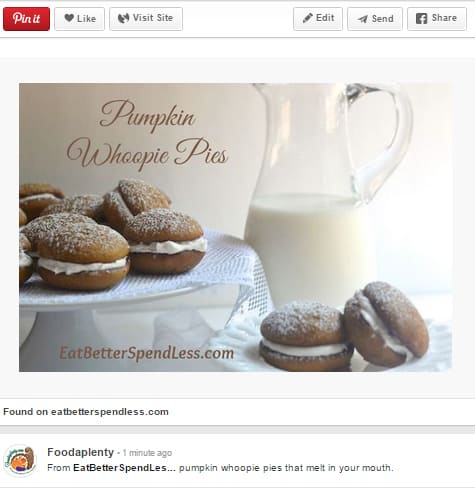
- When pinning your own pictures to Pinterest, use good descriptions and a link to your website. For an image of your favorite whoopie pie recipe, instead of using a description like “Pumpkin Whoopie Pies”, use something more appealing to searchers like “From EatBetterSpendLess.com, pumpkin whoopie pies that melt in your mouth” (pinned from EatBetterSpendLess.com).
- Pin your food images to specific categories. For example, if people go to your Food board you don’t want your viewers seeing endless videos of your dog (unless he’s enjoying your food, of course). They probably won’t be following you very long.
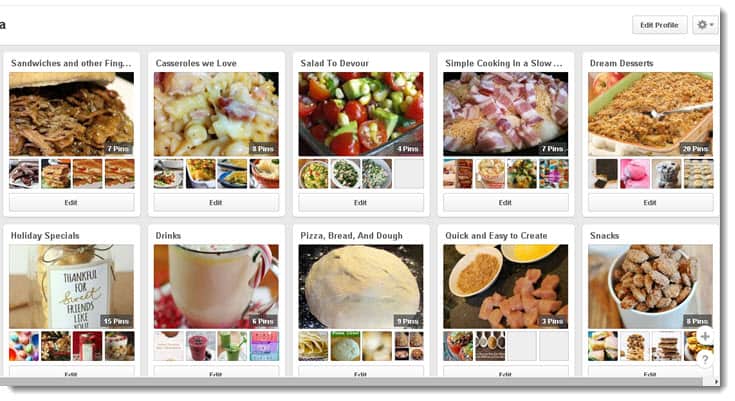
- Get creative with your categories but keep them simple enough that others know what the board is about. For example, these categories from the Comfort Food Mama uses clever descriptive words like Dream Desserts for each board.
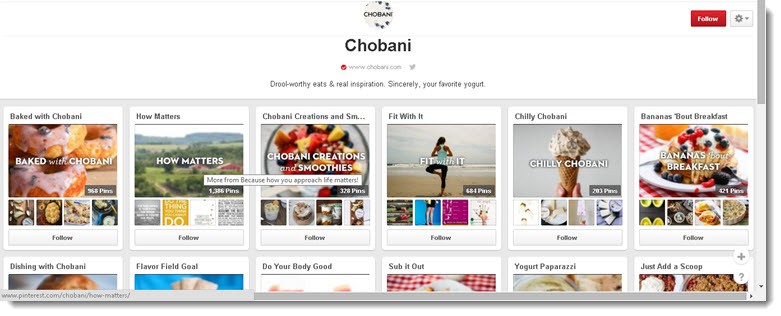
- Each board should be for a specific topic. This allows people to follow only those that interest them. This is especially helpful for pinning pictures of other people’s recipes. Chobani’s Pinterest account, does this by having boards with recipes that contain one of their products.
Pinterest-Like Sites for Foodies
Several social media sites are specifically geared toward foodies and are quite similar to Pinterest. Here are a few to check out:
- FoodGawker.com — This site is a curated photo gallery that allows food bloggers to submit photography and recipes.
- Taste Spotting — Users submit images/links from around the web and their editorial team reviews the submissions for high quality.
- Food52 — This is a social site for recipe input and commenting.
- Food Buzz — This site allows independent food blogs around the net to join and contribute.
Using Images on Facebook
On Facebook, your images should be clear and easy to view. If it’s blurry, has poor contrast, is dark, cropped funny, or has low resolution it can be hard to tell what the image is. People will move on quickly. You only have a few seconds to make a good impression. Your image needs to be simple and straight to the point. Use the correct size images. On Facebook the uploaded cover photo size is 2048 px X 2048 px while the Timeline photo thumbnail is 504 px X 504 px.
Create a text overlay with your website’s link using online editing tools for a specific call to action.
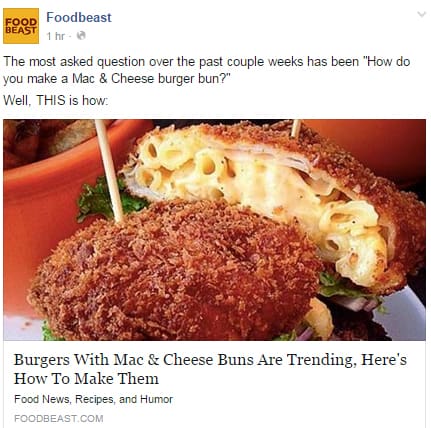
Use descriptive information in the post so viewers know what you are sharing and can easily share it with others, like this post from Foodbeast.
When you upload images to Facebook, make sure you preview them before posting. You may need to adjust how they are cropped so you are seeing the best part of your image.
Specific Tips for Using Images on Twitter
Twitter is fairly new to showing images and not all apps who them, but gere are tips on getting the most out of Twitter for your food blog graphics.
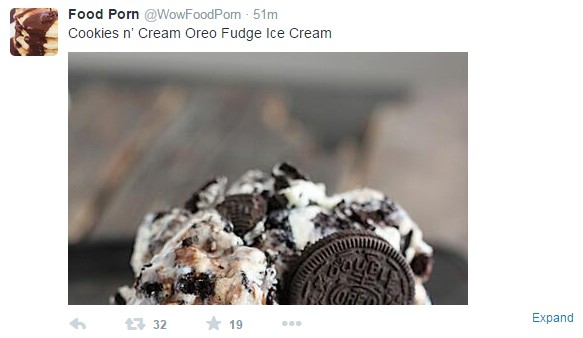
- Horizontal images work best on Twitter. Long vertical images can get cut off when they appear in a user’s Twitter stream.
Here’s an example where the image gets cut off when the image is taller than it is wide. The image looks good on the actual Twitter account page, but in your follower’s stream, it gets cut off like this.
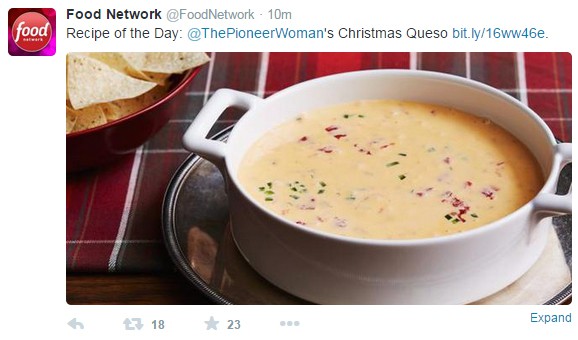
Here’s an example from Food Network with a photo with good dimensions:
- Tag people or companies in your images, particularly if you share product images. Include the company’s Twitter handle.
- Overlay words on your images before you share them. Use your blog URL, the title of a post the image relates to or a simple caption.
- Use bright colors in your images to get attention. They’ll stand out amongst all the other content.
Using graphics on social media is the optimal way to promote your food blog. As any foodie knows, we eat with our eyes first. Seeing images of your creations helps viewers relate to your food blog posts. And remember, if we can help you save a lot of time and work creating your own photos, consider joining our Bite-Sized Bundles monthly recipes with original food photos membership and we’ll take care of the photography for you.